Pages

Wednesday, October 31, 2012

Happy Halloween!


Good morning everyone!  Today, it's just a little note to wish all of you a safe, Happy Halloween

If you are looking for a little Halloween inspiration, here is a fun activity that my oldest and I did last week, and here is another "orange" themed recipe.

We're dressed up as a witch (me), a tiger (oldest) and a dinosaur (youngest).  DH doesn't get to dress up at work.

Stay tuned for "Slow Cooker Thursday" tomorrow...and a special slow cooker themed link party!

Take care :-)

Monday, October 29, 2012

Eastern Chicken

We are always trying to find new flavours for our chicken.  Change is good!  This time, I found a recipe in my "Company's Coming - Barbeques" cookbook that I thought we should try.  It has grapefruit juice in it, and we happened to have grapefruit juice in the fridge...perfect timing!  It also seemed like a fresh flavour to try...grapefruit juice and chicken...we'll see! 

Here is the recipe:

1 1/2 cups grapefruit juice
1/2 cup vegetable oil
1/4 cup vinegar
1 tablespoon sugar
1 teaspoon salt
1 teaspoon mustard
2 teaspoons onion flakes
1 clove garlic, minced
1/2 teaspoon oregano
1/2 teaspoon paprika
1/8 teaspoon thyme
3 lbs chicken (I used boneless, skinless chicken breasts)

In a large bowl, combine the first 11 ingredients.  I like to marinate my meat in ziploc bags, so I then put the chicken into a large ziploc bag and then poured the marinade into the bag.  Do this in the morning (or the night before) and allow the chicken to marinade all day (or overnight).

Preheat your grill to medium.  Place your chicken on the grill, baste with the marinade and turn often.  Grill for about 30 minutes or until the chicken is cooked thoroughly.

VERDICT
This was a nice change for us for the chicken.  We don't often have grapefruit juice in the house, but next time we do and have some "extra" then we would likely make this again!

Did you know that you can also follow me on Facebook and Twitter?!

Sunday, October 28, 2012

Scrumptious Sunday Recipe Link Party #35

Hello friends! Happy Sunday to you!

I'm a little behind this week...no features (yet) from last week's party.  I will post double the features later this week.  Stay tuned :-)

Short and sweet today...
It's time to share your fabulous recipes HERE for Scrumptious Sunday #35!

Don't forget, all featured recipes will be shared on my blog, and on my Facebook, Twitter and Pinterest pages!

Thursday, October 25, 2012

Beef Barley Soup - Slow Cooker Thursday

Welcome to the second installment of "Slow Cooker Thursday!"  If you missed last week's post and story why I've implemented "Slow Cooker Thursday", just click over here :-)

When I picked the "Busy Day Beef and Barley Soup" recipe from my new Best of Bridge Slow Cookers cookbook, I had no idea that day would be a "beef" day everywhere I looked!  I say that because a friend from work and I had lunch together, and because she didn't have time to make her lunch before leaving for the office, she needed to grab lunch from the cafeteria/culinary training facility.  I was laughing because at the sandwich station, the special was "Roast Beef Sandwiches".  At the main course/hot food station, one of the specials was "Beef Stroganoff," and at the soup station, one of the soups was "Beef Barley Soup".  Apparently the Chefs/Instructors were in a beefy mood like me!  I do have to say though, my soup looked way better than the students' soup...just sayin'!

Here is the recipe I used (Source: Best of Bridge Slow Cookers)

3 cloves garlic, minced
1 onion, chopped
1 teaspoon dried oregano
1teaspoon salt
1/4 teaspoon pepper
2 tablespoons tomato paste
1 tablespoon vegetable oil
3 carrots, finely chopped
2 bay leaves
1 1/2 lbs stewing beef
1/4 cup barley, rinsed
4-5 cups beef broth
1 cup frozen peas
2 tablespoons fresh parsley
1 tablespoon balsamic vinegar

In a saucepan, saute oil, garlic, onions, oregano, salt, pepper, tomato paste.  Saute until the onions are softened.  Transfer to 4-6 quart slow cooker.  Add in the carrots, bay leaves, beef, barley and 4 cups of the beef broth.  Stir well.  Cover and cook, on low for 8 hours or on high for 4 hours, or until the beef and barley are tender.  After cooking, if the soup is thicker than you would like, add in the remaining 1 cup of broth.  Stir in the frozen peas, vinegar and parsley.  Cover and cook on high until the peas are hot, about 20 minutes.  Remove bay leaves.  Add salt and pepper to taste.

Tips directly from the Best of Bridge: 
- They use tomato paste in many of their slow cooker recipes because it boosts flavour and richness.  A dollop or two of tomato paste makes a significant flavour difference with onions, garlic and herbs as these aromatic ingredients dull when cooked for long periods.
- If you cannot find stewing beef, look for other cuts such as boneless cross-rib, blade or chuck in the form of steaks or pot roasts.  Trim off excess fat and cut into cubes.
*Great tips!
VERDICT:
Hubs LOVED this soup. Kept commenting how much he enjoyed it.  I really liked it too...as did our kids.  The oldest complained a bit (apparently he doesn't like soup for dinner) but he still ate it a few times LOL.  Even our sometimes fussy toddler was gobbling up his meal...I'd call this one a success!

You can purchase the Best of Bridge Slow Cookers cookbook through Robert Rose.  Go check them out!

Excerpted from Best of Bridge Slow Cooker Cookbook by Sally Vaughan-Johnston & The Best of Bridge Publishing Ltd. © 2012 www.robertrose.ca All rights reserved: May not be reprinted without publisher permission.

Wednesday, October 24, 2012

Sweet Potato Pumpkin Ginger Soup - Guest Post by Asilia from Reasons to Procrastinate

Hello everyone!  Please join me in welcoming Asilia from Reasons to Procrastinate!  She is a sweet fan of mine, relatively new to the cooking world.  Her recipe for Sweet Potato-Pumpkin Ginger soup sounds great!  Read on :-)

----------

Hi. I am so excited to be able to guest post for Dawn. Addicted to Recipes is such an amazing blog, and I am completely addicted to finding perfect recipes. My name, well my pseudonym is Asilia. I am a teenager, self-proclaimed nerd, fashion addict, lifelong vegetarian, and extremely amateur foodie. I am a high school student, so obviously I am always looking for Reasons to Procrastinate.

I only started cooking this summer, and I love experimenting with flavors to create healthy food that is not every dieter’s nightmare, rabbit food. I look forward to Friday nights, when the kitchen is my laboratory. Clearly I don’t get out much. I love the fall, and soup is simply perfect on a crisp, or a bit chiller than crisp, autumn evening. This Sweet Potato- Pumpkin Ginger soup is simply divine. Garnished with a dollop of sour cream, or in this case Greek Yogurt, and some basil, it (almost) looks gourmet and definitely tastes so. Make it a meal with some garlic bread on the side (literally a slice of bread, topped with minced garlic, basil, and a little bit of olive oil).


Sweet Potato- Pumpkin Ginger Soup
Serves 2-4

2 medium sweet potatoes
1 piece of pumpkin (about 2 in by 2 in)
¼ cup skim milk (optionalP
7-10 leaves of fresh basil
¾ tbsp grated ginger (I just used a fairly large chunk of ginger, let the blender do the work!)
½ tsp chili pepper
A pinch of nutmeg (more like ½ a pinch)
½ tsp cumin
1 medium clove garlic
Salt and pepper to taste
Greek yogurt or sour cream (garnish)
Some chiffonaded (that is a word now) basil leaves (garnish)

Just peel and cook the sweet potatoes and the pumpkin. I don’t peel the pumpkin because if you cook it long enough it gets soft enough to blend. My mom cooks them in the pressure cooker. You can chop them up and cook them on the stove, but the pressure cooker makes life so much easier. WAIT FOR THEM TO COOL before putting them in the blender. Unless you are trying to see if you can mimic a geyser in your very own home.

Blend all the ingredients in the blender, adding water to achieve a desired consistency. I kept it pretty thick, but I still had to add almost a cup of water. Then again, I did not use milk.

This makes 2-3 generous main dishes or 4 appetizers.

Serve warm with a garnish of greek yogurt/sour cream and chiffonaded basil.

Then curl up with a good book. Then realize you have homework (if you are in high school).

Tuesday, October 23, 2012

Rice Krispies Halloween Treats!

The other day a parcel arrived at our house from our friends at Kellogg's...our oldest son was so intrigued about what was inside this magical white box, needless to say, we had a lot of fun playing games with him.  It was almost like Christmas...except that it's Halloween!  But there we were, shaking the box, slowly opening the box, slowly showing him the bits inside the box...and what bits they were!

Just some of the great stuff inside the Halloween Box!

All of the ingredients (except butter and vanilla...but that's a little harder to ship!) to make HALLOWEEN RICE KRISPIES TREATS!  Oh yes we did...and what a GREAT time we had doing it!  We went online to look at some ideas of what to do with our Halloween theme, which made for a fun way to shake up our routine treat making.  Because we opened the box on a weeknight, we decided to wait until the weekend to make our treats.

Once Saturday came, there was no containing the excitement.  When it came time to "bake", our son was so practically vibrating about all the candy samples that came with the Rice Krispies and marshmallows.  He laid them all out and organized them just "perfectly" (yes friends and family, you can laugh now...the apple doesn't fall far from the tree!).  We worked together to make the Rice Krispies treats...the "old fashioned way" (following the recipe on the Rice Krispies box) - on the stove top - melting the butter, melting the marshmallows (it's great practice for him to count the marshmallows as they enter to pot), adding in the vanilla, adding in the Rice Krispies, mixing, mixing, mixing!
Then came time to play!  I would ask my son what he wanted for shapes...to use the awesome pumpkin or bat cookie cutters that came in the pack, or roll balls for eyes, faces, etc...and of course, every little boy needs a Rice Krispie snake to decorate!

Halloween Rice Krispies Snakes - Hand rolled and decorated by our 5 year old!

We had so much fun the two of us making and decorating our Halloween Rice Krispie Treats.  It was such great bonding time for us...and my son talked about his creations non-stop until bedtime...and is still talking about them a few days later.  What a wonderful memory!

Close-up of a few of the treats...a few mummy faces, eyeballs, and pumpkins!


VERDICT
Of course, these were TASTY!  I've never added candy to my Rice Krispies sqaures before, and it was a fun little addition for us.  Rice Krispies treats were part of my childhood, and it's great that they are part of my childrens' childhoods too.  Even the baby was smacking his lips eating little bits of the treats (none of the candy for him though!).

Thank you Kellogg's for providing the gift that made an afternoon of memories for me and my son!

Monday, October 22, 2012

Nutella Cheesecake Bites

Fantastic sweet treat, perfect for a pot luck - Nutella Cheesecake Bites
Recently, we had a surprise 40th birthday party to attend.  I was SUPER excited about it for many reasons.  Not only were we going to see some friends we hadn't seen in a long while, it also meant that hubs and I had an evening out...it's been a few months since we've had an evening out together (crazy, hey?!).  The party was a pot luck, and I was stumped about what to bring for our portion of the pot luck.   I had plans to hit the grocery store the morning of the party (it had been a busy week leading up to the party and I hadn't made it sooner), but then one thing after another happened that Saturday and I couldn't get to the store.  With time dwindling and my brain racing, I opened the pantry and the fridge doors (the two are side-by-side) to see what we had and to think about what I could create. 

First this that caught my eye was a jar of Nutella.  "Hmmm," I thought to myself, "I haven't made anything with Nutella in a while, what can I do?"

A little searching in the fridge and I found some cream cheese.  Nutella and cream cheese...YES, those would go well together!  More thinking..."OK, I mix those up and they will taste good, but perhaps a little thick or too rich?  What else can I add?  What about whipping cream?! Yes, whipping cream!"

Take a look and nope...don't have any.  Thinking, thinking.  Wait a minute!  Hubs bought some Cool Whip a while ago, I wonder if there is any left?...Check the freezer and SCORE, there is most of a container there! 

Nutella, cream cheese and Cool Whip. I'm thinking these three things blended together should be pretty tasty! 

Now what...make it a mousse? Serve in a bowl to scoop?  That's a lot of dishes to do.  Don't want to do that to the hostess and "birthday boy". 

My brain is still working...There's got to be something more.  Back into the pantry.  Hmmm..a crumb pie crust?  I know I have graham cracker crumbs, which would do in a pinch, but I wonder, what about Oreo crumbs? Do I have any? 

Check the baking shelf, and score again! There is a partial box there! 

So...if I put the Nutella, cream cheese and Cool Whip all into the KitchenAid and mix it up well...create a pie crust from the oreo crumbs...voila, a cheesecake type of dessert! 

But wait, still hung up on those dishes...how can I make these "individual"... look in the baking cupboard and there are mini cupcake liners...but they are snowman patterned, do you think anyone would mind?  Hubs convinces me that snowmen will be fine, though I am not sold.  But I do it anyhow.  Make a pie crust base to line each of the mini cupcake cups.  Pop them into the fridge to set.  Make my cheesecake filling.  "Fill" the cupcake cups, sprinkle more crumbs on top for decoration, and everything back into the fridge to set.  And then I think to myself..."Oh man, I hope these turn out, and that they taste good!"  Verdict to follow...

Crust:

1 1/4 cups Oreo baking crumbs
1/4 cup butter, melted

Combine the crumbs and butter, mix well.  Set out 30-35 mini cupcake liners on a tray.  Spoon the crumb mixture  into the mini cupcake liners.  Press the crumbs into the base of the liners to create the "crust".  Put the tray into the fridge so that the crust can set.  Meanwhile, work on the cheesecake filling.

Cheesecake:

1 package cream cheese (softened)
3/4 cup Nutella
1 cup Cool Whip (thawed)

Blend all three together in a mixer.  I blended for a LONG time to ensure that there were no lumps of cream cheese. 

Remove the crusts from the fridge, then spoon the filling into each crust.  I had considered piping the filling into the crust, which I think I will do next time - but due to a lack of piping bags, I didn't try this time.  Once the crusts were filled, I sprinkled a few crumbs on top and put them back into the fridge to set.

Prior to leaving for the party, I took the tray out of the fridge and peeled off all of the cupcake liners.  Partially because I just couldn't go to a birthday party in October with snowmen cupcake liners, and partially because I thought they looked better anyhow without a liner.  I arranged them all on a tray, and we were off to the party.

VERDICT:
These were a HUGE hit.  Being in a room full of people I was able to gauge reaction without being too obvious.  When I saw people taking seconds almost immediately I knew that the recipe was a success!  Yay!  The birthday boy requested the recipe, as did a few others.  Woohoo! It's a keeper :-)

Note:  I did make sure that I made a little sign for the dessert in case there were any nut allergies (and there were...phew!). 

Did you know that you can also follow me on Facebook and Twitter?!

Sunday, October 21, 2012

Sunday Social - The Sasse Life

New to Sunday Social?
Here is how it works:
1. Please follow the Featured blogger.
2. Link up your blog's homepage.
3. Check out some other awesome blogs that linked up.
4. Have fun & get social!

This week's featured blog is Addicted to Recipes.

Hello everyone! I'm Dawn, and I write the blog "Addicted to Recipes". My blog started as a new year's resolution - to try making one new recipe a week, and then blog about it - that way I was accountable to myself for keeping my resolution. And it worked! Here we are in October and my resolution is going strong....and I am having a BLAST! (if only all of my resolutions were so successful!) I'm now posting at least two new-to-me recipes each week, hosting a weekly recipe link party, and learning Facebook and Twitter! Outside of my blogging life, I am a wife and Mom to two wonderful little boys, ages 5 and 1. I am surrounded by testosterone and sometimes I wonder how that happened! LOL! I also work full-time outside the home, as does my hubby, in addition to owning our own business.  Crazy, I know! 

5 Silly Facts About Me :-)
1) I'm not ambidextrous, but I am a righty AND a lefty. I write with my right hand, but I mouse with my left, play ball on my left, play hockey on my left...but I can golf right or left!
 2) I have curly hair and straight hair. Sometimes it is stick straight, sometimes it goes way curly. More of it has gone curlier after pregnancies, but I still have crazy straight parts too.
 3) I have lived in 12 houses in my life, 10 of them in the city that I currently live in. I've owned 4 of them.
 4) I can remember EVERY phone number I've had in my life. Not kidding!
 5) I am still close friends with people I went to preschool with. We met 35 years ago, when we were 3!

Thanks Kim for hosting me this week!

Make sure to stop by Dawn's blog to say hi!


Scrumptious Sunday Recipe Link Party #34


OK, is it just me, or are the week FLYING by?  Umm...Christmas is going to be here before we know it...I better start planning!  Though hopefully our son's hockey schedule gets posted soon, so that I actually CAN start planning!  I have crafting to do, a baking exchange to host, vacation days to take, plus all the other fun that comes with the last few months of the year!

Did you catch all the updates from last week?  A few new recipes...Grilled Vegetable Basket and my first installment of Slow Cooker Thursday!  A great Guest Post from Sherry K too!

Voting is still open over at the Canadian Blog Awards...Addicted to Recipes has been nominated for "Best New Blog"!! Check it out here!

AND...I have my AD SPACE on sale for the month of October, 25% off! Promo Code is FALLINTOSALE25...would love your support!

That's the update on my end! I sure hope your weekend has been wonderful!! Now... It's time to share your fabulous recipes HERE for Scrumptious Sunday #34!

Don't forget, all featured recipes will be shared on my blog, and on my Facebook, Twitter and Pinterest pages!

Saturday, October 20, 2012

Scrumptious Sunday #33 - Features

Has it been a crazy week for you? Yes, here too!  The cold bug has hit our house again, this time it's my hubby who has it.  But the trooper that he is (yes, there are moments of whininess...but that's normal for all of us!), he was still up at 5 am to get our oldest ready and take him to his hockey game, which started at 6:30 am.  It was a professional development day at school yesterday, so our oldest had the day off.  Hubs took the day off to hang with him...and take him to hockey.  Are you seeing a trend here?  There was hockey on Thursday after school, Friday morning, this morning at 6:30 and again tomorrow morning at 10:15.  And this is first year hockey...I can only imagine what it will be like in a few years!  BUT...our son is loving it, and that is the most important thing!

Outside of hockey, we've also been to swimming lessons, I've been doing some cooking for the blog, took the oldest for a hair cut as picture retakes are this week.  That's a story too.  Oh man...so the photography company sends home the form to select your poses and background for school pitcures.  I picked a neutral grey, and chose a red and grey shirt for our oldest to wear for the photos.  Well, somehow, our 5 year old convinced the photographer that because his shirt was red, the background should be red too.  He told me about it after the pictures, but I thought he was kidding.  Turns out, he wasn't.  And talk about hideous pictures!  I can't believe it! How on earth did he convince them? Man oh man!

Alrighty, onto this week's features!  I'm just loving all the fall recipes!

If you are featured, please grab a
BUTTON! You've earned it!


I was featured, I was Featured by Addicted to Recipes


Congratulations to everyone!  Here are this week's features:

No Bake Healthy Energy Pops from A Little Inspiration


Bread Making for Beginners from Aunt B on a Budget


Creamy Chicken Corn Chowder from Galley Kitchen/Bake Up Little Suzy


Pumpkin Cheesecake Brownie Pie from Inside BruCrew Life


All of these recipes will be pinned to my Pinterest account, posted on Twitter, and shared on Facebook!

Just a reminder, this week's Scrumptious Sunday Link Party goes live Saturday - at 8 pm PST. Can't wait to see what you bring to the party!

Thursday, October 18, 2012

Chicken Stew with Sweet Potatoes - Slow Cooker Thursday

Well, it's upon us!  Hockey season that is.  I know, not the NHL (yet!?)...but this year is the first of what could be many years of minor hockey in our home.  Our 5 year old started playing this season...and so far so good!  We are happy that he is active and wants to try new sports, and we will see if he enjoys hockey (it won't be forced upon him though!).  So...with hockey season here, that means practices and games each week.  He has a practice every Thursday after school, which makes things just a little crazier for us come dinnertime.  So...I've decided to make Thursdays "Slow Cooker Thursdays".  Makes perfect sense to me, to get our dinner started before I leave for work, so that everything is ready once we get home from work/school/daycare/hockey. This week is our first installment!

I was ever SO lucky to receive a copy of the new "Best of Bridge Slow Cookers" cookbook...ummm, hello...soooooo excited...not only is it a cookbook (love!) it's also Best of Bridge (classic!).  I'll have a review up on the blog very soon, but in the meantime I just had to start trying new recipes!  For our first "Slow Cooker Thursday" I decided to make the "Saturday Chicken Stew with Sweet Potatoes" - here is the recipe and what I did (very slightly amended from the original Best of Bridge recipe):

1 lb sweet potatoes, peeled and cut into chunks
3 carrots, peeled and sliced
2 stalks celery, sliced
2 bay leaves
6 skinless, bone-in chicken thighs (note, as per the Best of Bridge suggestion, you will more likely find the chicken thighs with skin on...just remove the skin using a piece of paper towel to grab the skin at one end and pull off firmly - it worked well!)
1 tablespoon olive oil or vegetable oil
1 onion, chopped
4 cloves of garlic, minced
1/2 teaspoon dried thyme or oregano
1 teaspoon salt 
1/4 teaspoon pepper (I used a little more)
2 tablespoons all-purpose flour
1 1/4 cups chicken broth
3/4 cup unsweetened apple juice (I used Sun-Rype)
1 cup frozen peas
1 tablespoon cider vinegar
1/4 cup fresh parsley, chopped

Wash and prepare your vegetables.  Add the sweet potatoes, carrots, celery and bay leaves to your slow cooker.  Place the chicken thighs on top of the vegetables.  Next, heat oil over medium in a skillet.  Add your onions, garlic, thyme or oregano, salt and pepper.  Cook for 5 minutes, stirring occasionally.  Mix in the flour, then add the chicken broth and apple juice.  Bring to a boil (approximately 5 minutes).  Pour over the chicken and vegetables.  Cover and cook on low for 5-6 hours on low (which is what I did) or for 2.5 - 3 hours on high.  Juice will run clear when the chicken in pierced.  15 minutes prior to serving, turn crock pot to high.  Add in the peas and vinegar.  I also added in a little roux at this time.  Add more salt and/or pepper if needed.  Cover and cook (on high) for 15 minutes or unti the peas are hot.  Remove bay leaves, stir in parsley.

VERDICT:
My husband said that (besides chili), this was one of the best slow cooker recipes he's had.  We both agreed it could have used a little more seasoning to kick it up a bit, but we all enjoyed the meal.  Our 5 year old LOVED it.  He also really loved the tea biscuits that I made to go with the stew.  And the sweet potatoes were a nice change of pace for us.  This is one that we would make again!

Did you know that you can also follow me on Facebook and Twitter?!

Excerpted from Best of Bridge Slow Cooker Cookbook by Sally Vaughan-Johnston & The Best of Bridge Publishing Ltd. © 2012 www.robertrose.ca All rights reserved: May not be reprinted without publisher permission.

Wednesday, October 17, 2012

Asiago Quiche Cups - Guest Post by Sherry K from Jazzy Gourmet

First of all, may I say how nice it is to meet all of you out there in Addicted to Recipes land! I am so thrilled to be guest blogging today. In fact, this is my guest blogging debut; so thanks, Dawn, for the opportunity!

My name is Sherry K - pianist, composer, and national cooking contest finalist. I'm also known as the Jazzy Gourmet, because when I'm home, I like to jazz up my meals. I have an array of how-to videos, filled with jazzed up recipes, quick tips, gadget reviews and learn-from-my-mistakes advice.


My friend Bud, our very special spud, is going to help me introduce our recipe for today.


Asiago Quiche Cups with Tomato Jam make a great appetizer or side dish for any meal. We start with thinly sliced potatoes formed into a cup. Then we load the cups with a luscious cheesy quiche filling, topped with tangy tomato jam. Bud says they are so good, you might not be able to stop with just one!
 

Asiago Quiche Cups with Tomato Jam

Tomato Jam:
1 teaspoon olive oil
1/4 cup chopped onion
1 large tomato, peeled and chopped
1/2 teaspoon mustard seed
1/2 teaspoon dried thyme
1/2 teaspoon cinnamon
1/2 tablespoon molasses
1 tablespoon red wine vinegar
a pinch of chili pepper flakes  

Asiago Quiche Cups:
1 large potato, peeled
2 teaspoons olive oil
1/2 teaspoon salt, divided
2/3 cup heavy cream
2 eggs
4 ounces reduced fat cream cheese, softened
3/4 cup grated asiago cheese
1 teaspoon finely chopped fresh rosemary
1/4 teaspoon freshly ground pepper
sour cream for garnish


For the jam, heat a small saucepan to medium high heat. Add 1 teaspoon olive oil. When the oil begins to shimmer, add the onions and cook for a few minutes until tender. Stir in the tomato, mustard seed, thyme, cinnamon, molasses, vinegar and chili pepper flakes. Turn the heat down to low and simmer until the mixture reduces and becomes thick, about 40-50 minutes.

Preheat your oven to 375 degrees F. While the jam simmers, start making the cups by slicing the potato thinly on a mandolin. Toss the slices with 2 teaspoons olive oil and 1/4 teaspoon salt.

Spray cooking spray onto 8 cups of a 12-cup muffin pan. Divide the potato slices evenly into each of the 8 cups, arranging them to form the outline of the cup. Place in a 375 oven for 15 minutes.

In the meantime, place cream, eggs, cream cheese, asiago cheese, rosemary and pepper in a medium bowl and whisk thoroughly. When the potato cups have cooked for 15 minutes, remove them from the oven and ladle the egg/cheese mixture evenly into each of the 8 cups.

Return to the oven and cook for an additional 20-25 minutes, or until golden and puffy. Remove cups from the oven and garnish with Tomato Jam and sour cream. Serve immediately. Makes 8 cups Watch video here:


Can't see video? Watch it here: Asiago Quiche Cups

Join Sherry K - Jazzy Gourmet on Facebook, Pinterest, Twitter

Monday, October 15, 2012

Grilled Vegetable Basket

In case you missed this when I shared it over at Tales of a Ranting Ginger...here it is for you!

We eat a tonne of vegetables at our house.  We are incredibly fortunate to live in a region that produces a lovely variety of vegetables for us, and we are able to purchase all a nice variety of vegetables at our local supermarkets - it seems we always have great selection to choose from!

One of our most favourite things to do, especially in the summer - though we do use our BBQ year-round, is grill vegetables.  We have a grilling basket for our BBQ that I think is the absolute best thing we've ever purchased for our BBQ.  We've bought these grilling baskets for people as gifts, we just LOVE ours that much!

Every time we do a Grilled Vegetable Basket, our "recipe" changes.  In fact, there is no real recipe, just "guidelines".  Or, more like, "What vegetables do we have on hand to chop and grill?".  Here is an example of one of our recent grilled vegetable baskets:


Cut up your vegetables into nice chunky pieces.  Here I used:

Red Pepper
Onion
Snap Peas
Orange Pepper
Gren Pepper
Zuchini
Yellow Pepper

Place your vegetable in a bowl, pour olive oil on top (just enough to coat, no need to overdo it), and sprinkle Montreal Steak Spice (as much or as little seasoning as you desire).

Preheat your grill, place your grilling basket on the BBQ.  When warmed, pour the vegetables from the bowl into the basket.


When the vegetables are cooked, pour them from the grilling basket into a serving bowl.  Be careful, that grilling basket will be VERY HOT!


And now, they are ready to serve!  And BEAUTIFUL!  Great colours, great taste - and like I said, one of our favourite ways to prepare our vegetables.

Did you know that you can also follow me on Facebook and Twitter?!


Sunday, October 14, 2012

Scrumptious Sunday Recipe Link Party #33

It's been a great week for us...my MIL was here, and as always, it was a wonderful visit!  We always enjoy our time with her, though we were sad that my FIL couldn't make the trip this time. 

Our week was busy with company, school, day jobs, our business (aka the evening and weekend job), hockey, swimming, a surprise 40th birthday party, etc etc...all good fun!  I did get a little behind with the blog...my apologies, but I think you understand
;-)

Speaking of hockey, our son has hockey practice on Thursdays, which will make for a busier Thursday in our home.  So, I'm starting a new feature on the blog,  "Slow Cooker Thursdays" - I think I might even host a "Slow Cooker Thursday Link Party"...what do you think?!

I've already got a few new slow cooker recipes to try, recently I received a copy of the new Best of Bridge Slow Cooker Cookbook and I have been happily tagging new recipes to try :-)  Watch for the cookbook review coming soon too!

By the way...did you happen to catch the post earlier this week about my nomination for "Best New Blog" in the "Canadian Blog Awards"?!!  Check it out here!

AND...I have my AD SPACE on sale for the month of October, 25% off!  Promo Code is FALLINTOSALE25...would love your support!

That's the update on my end! I sure hope the weekend has been treating you fabulously!! Now... It's time to share your fabulous recipes HERE for Scrumptious Sunday #33!

Don't forget, all featured recipes will be shared on my blog, and on my Facebook, Twitter and Pinterest pages!

Friday, October 12, 2012

Scrumptious Sunday #32 - Features

Hello everyone!  We've enjoyed another fantastic fall week...wonderful weather, and a wonderful visit with my Mother-in-Law.  Our boys had a blast hanging with their Gramma!

Speaking of fantastic, it was another fantastic week of recipe sharing at Scrumptious Sunday.  Thank you so much!

If you are featured, please grab a BUTTON! You've earned it!


I was featured, I was Featured by Addicted to Recipes


Congratulations to everyone!

Everyone loves pizza in my house, I think this is a great idea!  Omelet Breakfast Pizza from In Cindy's Kitchen


I'm always on the lookout for new muffin recipes!  Super Healthy Pumpkin Bran Muffins from Skinny Kitchen


This one is for my hubby and Father-in-Law...first Thanksgiving we spent with hub's family, we went out for dinner and he and his Dad ate "steak soup" and raved about it...this version looks SO much better than the one they ate!  Steak Soup from Learning the Ropes...One Recipe at a Time


Cookie monster me is drooling :-)  Simple, Delicious, Healthy Peanut Butter Cookies from Forgetful Mama


I just love how Winnie's cake turned out!  I did a polka dot cake a while back but Winnie's looks waaaaay nicer than mine! Beautiful!   Chocolate Polka Dot Apple Cake from Winnish

All of these recipes will be pinned to my Pinterest account, posted on Twitter, and shared on Facebook!

Just a reminder, this week's Scrumptious Sunday Link Party goes live Saturday - at 8 pm PST. Can't wait to see what you bring to the party!


Thursday, October 11, 2012

Club House Prize Pack Giveaway Winner!

Thank you everyone who entered my Club House Prize Pack and $50 Gift Card giveaway

Congratulations to:
Rhonda G from Ontario!

Be sure to check out my current giveaway

Wednesday, October 10, 2012

Guest Post - Amber from Quilted Euphoria

Hello all you Addicted to Recipe's readers! My name is Amber and I blog over at Quilted Euphoria


 Don't let the name fool you, I've got more on my blog than just quilts. I do crafts, quilting, life, and recipes! Today Dawn is letting me share an awesome recipe with you and I hope you like it! 

I married a southern boy. 
He likes southern food. Grits, greens, chicken...the whole thing. So when this midwestern girl moved down south and hubs requested banana pudding, I thought he meant banana flavored pudding. One box of instant banana pudding and a scowl from hubs later, I realized I had some learning to do on how to cook for a southerner! 

So today I'm going to share a quick easy version of good old fashioned southern banana pudding. The great thing about this recipe is how flexible the proportions are. You can adjust them up or down depending on your likes. I would recommend using both boxes of pudding and all the banana's, because if not there will be none left over! However you can cut this in half for your crowd, or double it if you feel like it! 


I also like that this is something I can whip up in ten minutes, stick it in the fridge for later and forget about it. Then after dinner, I have dessert all ready and didn't have to think about it. Easy Peasy! 

Banana Pudding

You will need: 
1/2 box vanilla wafers
2-4 bananas, cut up
1-2 boxes vanilla flavored instant pudding. 
Whip cream (optional)
 

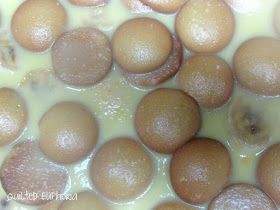
Place a layer of vanilla wafers in the bottom of a baking dish. 

 
Slice your bananas and place on top
Mix pudding according to package directions


Pour pudding over wafers and bananas. 


Chill in the fridge for at least four hours for the wafers to "Soften up". (trust me!)

Serve with whip cream ontop. (hubs doesn't like whip cream so we just eat it as is, and its delicious!)


Thanks Dawn for letting me share with your readers today! I hope you guys all come over to the blog and say hi! I love getting new friends/visitors/stalkers!